Elderflower Liqueur

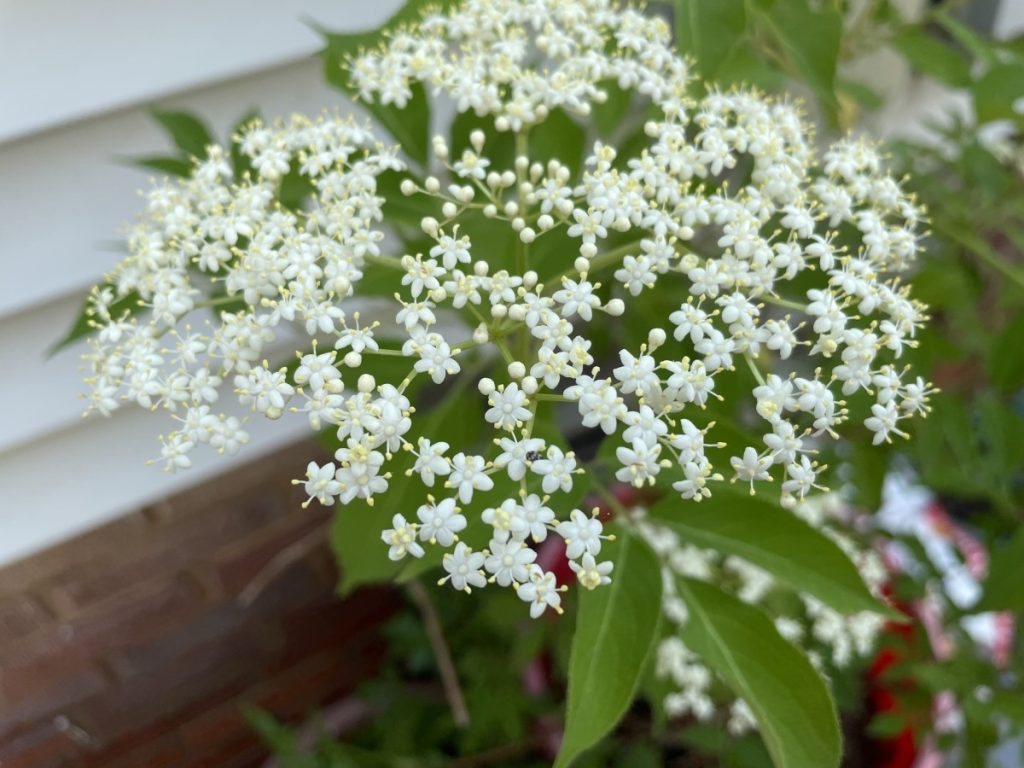
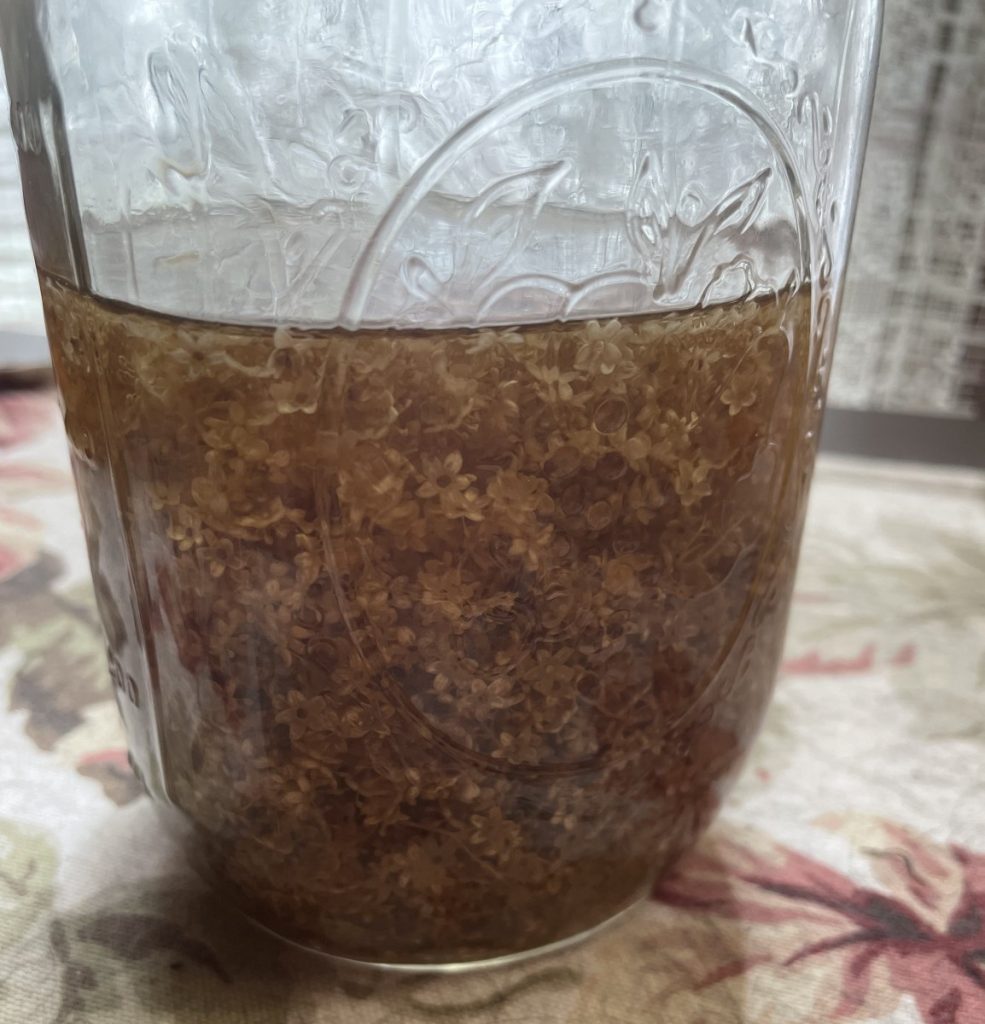
I make a lot of different liqueurs, most of which are fruit based. This one is quite different. This liqueur is made from the flowers of elderberry bushes. It has a sweet, slightly spicy flavor. Since my elderberry is blooming, it is time to harvest some of the blossoms and get started. They will been steeped in vodka- gin also works- then strained and sweetened. Could not be easier.
It is important to use ONLY THE BLOSSOMS. Elderberry stems and branches are toxic. It takes a few extra minutes, but get those flowers off the stems. Here is the recipe, with a few notes on options for sweetness levels.
Elderflower Liqueur
10 elderflower blossoms, about 1 cup of flowers, stems removed
2 c. vodka or gin
1/4 -1/2 c. sugar*
Remove all the flowers from the stems. They are small and it seems tedious, but it is important to get as many stem pieces off as possible. Place in a clean jar and pour over the alcohol. Cover the jar with a tight fitting lid and place in a cool dark place for at least a week or two. Strain out the flowers, using several layers of cheesecloth to get the liquid as clear as possible. Stir in sugar until dissolved. Return to jar, cover and let sit a few days before checking sweetness levels. You might want to add a little more sugar. Place in a pretty bottle and store in a dark place. Enjoy!! Makes 2 cups.
*You can add a lot more sugar, creating more of an elderflower cordial or syrup. It’s all about personal preference and how you want to use the liqueur. Add in 1/4 cup amounts, stirring to dissolve before adding more.
Bacon Waffles for Dad

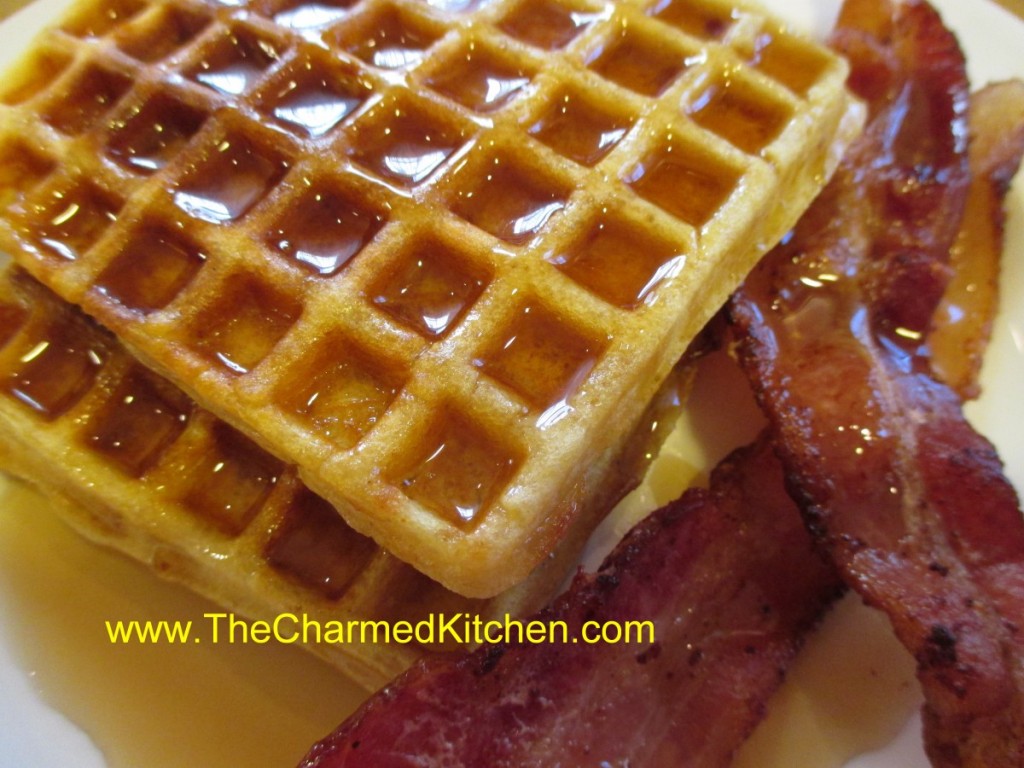
If you are looking for a special breakfast for Father’s Day, maybe dad would like some waffles. Even better, make him waffles with bacon inside them. Then serve your bacon waffles with extra bacon on the side!!!
For me, breakfast doesn’t get much better than waffles. Well, unless maybe you add bacon to the waffle batter.
Truth is, I don’t treat myself to waffles all that often, but if I am going to eat waffles, I go all out.
These are truly wonderful waffles. Light, crispy on the outside and studded with bacon. A drizzle of warm maple syrup and you are good to go.
So, if you are looking for a special treat for dad for breakfast, or lunch, or dinner or a snack… try these bacon waffles. You can thank me later.
Bacon Waffles
1 pound sliced bacon
1 3/4 cups all-purpose flour
1 tablespoon sugar
2 teaspoons baking powder
1/2 teaspoon salt
3 eggs, separated
1½ cups milk
¼ cup butter, melted
In a skillet, cook bacon until crisp. Drain; crumble and set aside. In a mixing bowl, combine the flour, sugar, baking powder and salt. Beat egg yolks, milk and butter; stir into dry ingredients until smooth. Beat egg whites until stiff peaks form; fold into batter. Add bacon. Before making each waffle, stir batter. Bake in a preheated waffle iron according to manufacturer’s directions until golden brown.
Giant Strawberry Shortcake

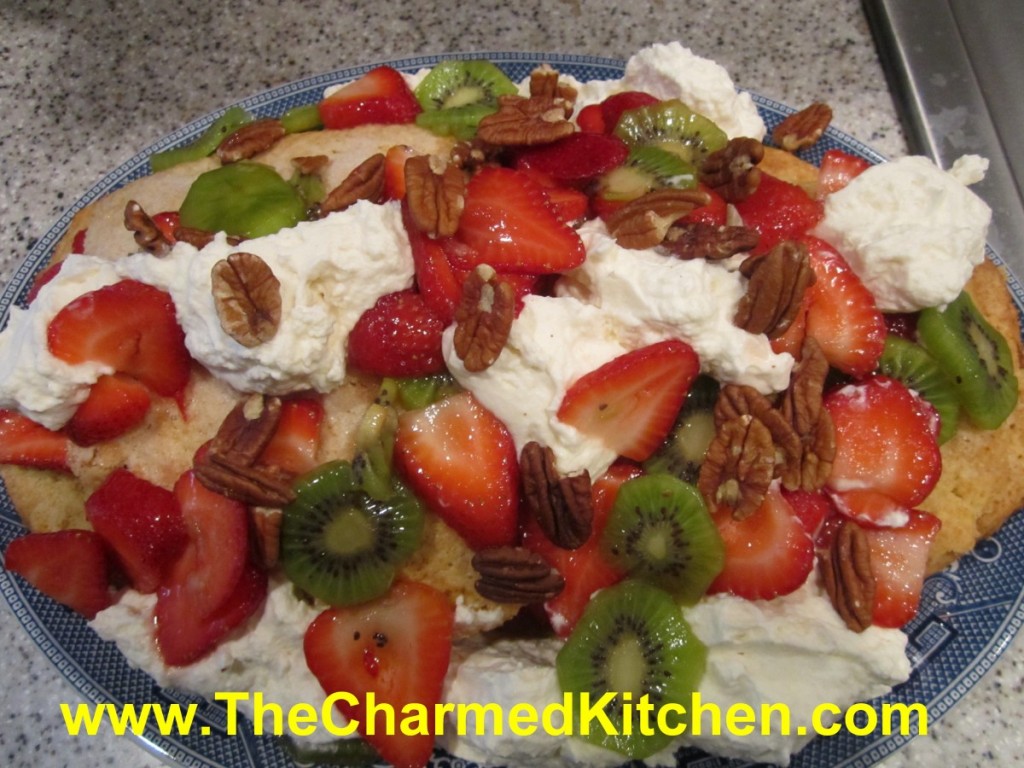
This is a great dessert for a party, picnic or barbecue. Instead of making a bunch of individual shortcakes, make one really big one. It makes quite an impression.
When ready to serve it, just cut into slices, like cake or pie. I often serve this shortcake with ice cream on the side. Feel free to switch up which fruits you use. I used kiwi fruit with the strawberries, but you can add different fruits. Peaches would go well with the strawberries or blueberries. Just have fun and use fruit combinations you like. We made it with strawberries and blueberries in class yesterday.
For the 4th of July, you could use a combination of strawberries, raspberries and blueberries.
Giant Strawberry Shortcake
1 egg
3/4 c. milk
1/2 t. lemon juice
2 c. flour
1/4 c. brown sugar
1 T. baking powder
1/2 stick cold butter plus 1 T. softened
1/2 c. plus 1 T. sugar
1 qt. strawberries, sliced thin
2 kiwi fruit, peeled and sliced thin or use other fruit like blueberries or blackberries
1/4 c. nuts, toasted, I left the nuts whole
whipped cream, optional
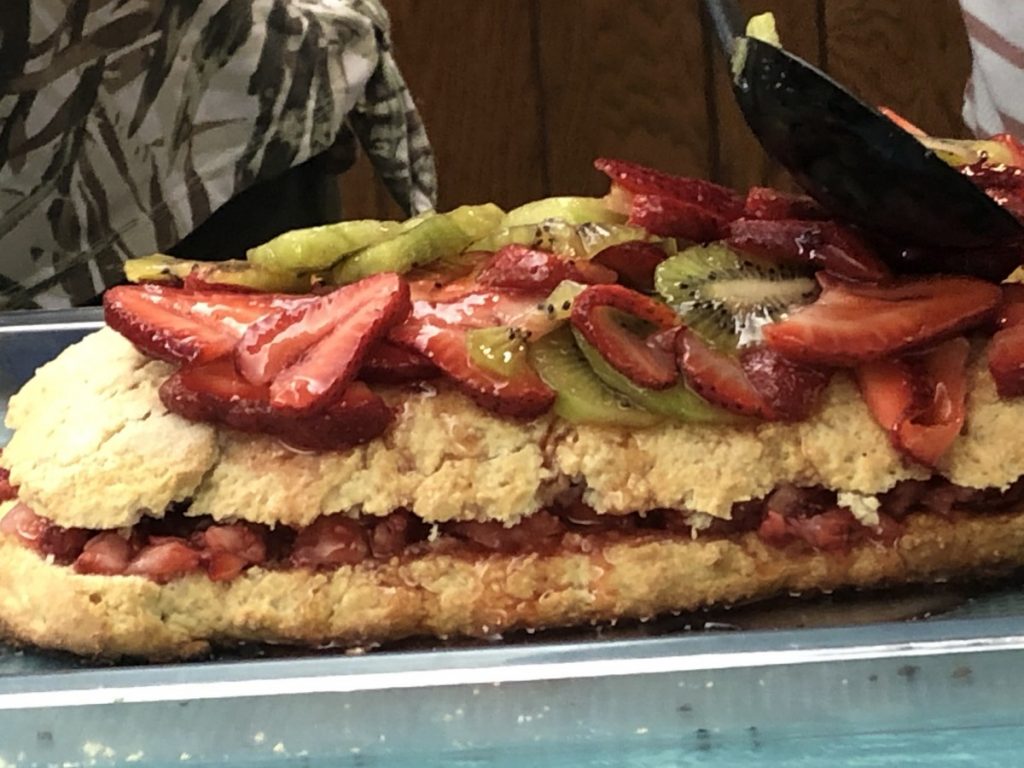
In small bowl combine egg, milk and lemon juice and set aside. In larger bowl combine the flour, brown sugar and baking powder. Cut in cold butter to resemble coarse crumbs. Add egg mixture and stir until mixture forms into a soft dough. Knead dough gently on a lightly floured surface about 10 times. On greased baking sheet pat dough into a 15×6-inch oval. Sprinkle dough with the 1 tablespoon of sugar and dot with the softened butter. Bake in a preheated 400 degree oven for 20-25 minutes, or until lightly golden. Place on wire rack to cool. Toss the berries with the remaining 1/2 cup of sugar. Allow to stand 30 minutes. Split the shortcake lengthwise and remove the top. Spoon over the half the berries and replace top of shortcake. Combine the kiwi with the remaining berries.Spoon over the remaining fruit and sprinkle with the nuts. Dot with whipped cream, if desired. Cut in wedges to serve. Serves 8.
Note: you can bake shortcake day ahead and prep the fruit day ahead, keeping it chilled and just assemble when ready to serve.
Cream Scones


I must admit that for me, the difference between a scone and a biscuit is sometimes hard to see. Both use the same ingredients, for the most part. They can be rolled and cut out the same way, too. I often say that scones are like biscuits, but with more stuff in them. Scones are often sweeter, too.
This recipe is a tough call for me. I was given the recipe by a friend a long time ago. She called them Cream Scones. I could easily see calling them Cream Biscuits, instead. Whatever you call them, these little gems are tender, flaky and super easy to make. You can make variations with all sorts add ins. I recently made some with mini chocolate chips and orange zest. They also are great for shortcakes!!
Cream Scones
2 c. flour
1 T. sugar
½ t. salt
1 T. baking powder
1 c. heavy cream
Preheat oven to 425 degrees. Sift together dry ingredients and gradually add cream to form soft dough. Knead lightly on a floured board until dough sticks together. Roll to ½ – ¾ –inch thickness and cut with 2-inch biscuit cutter. Re-roll scraps and continue cutting, handling dough as little as possible.* Place on baking sheet and bake 10-12 minutes or until golden. Makes 8-10.
* Instead of rolling them out and cutting into rounds, I pressed the dough into an 8-inch square. I cut the square into 4 smaller squares. I then cut and “x” across each of the four squares, making 4 triangles (16 in all). Bake as directed above.
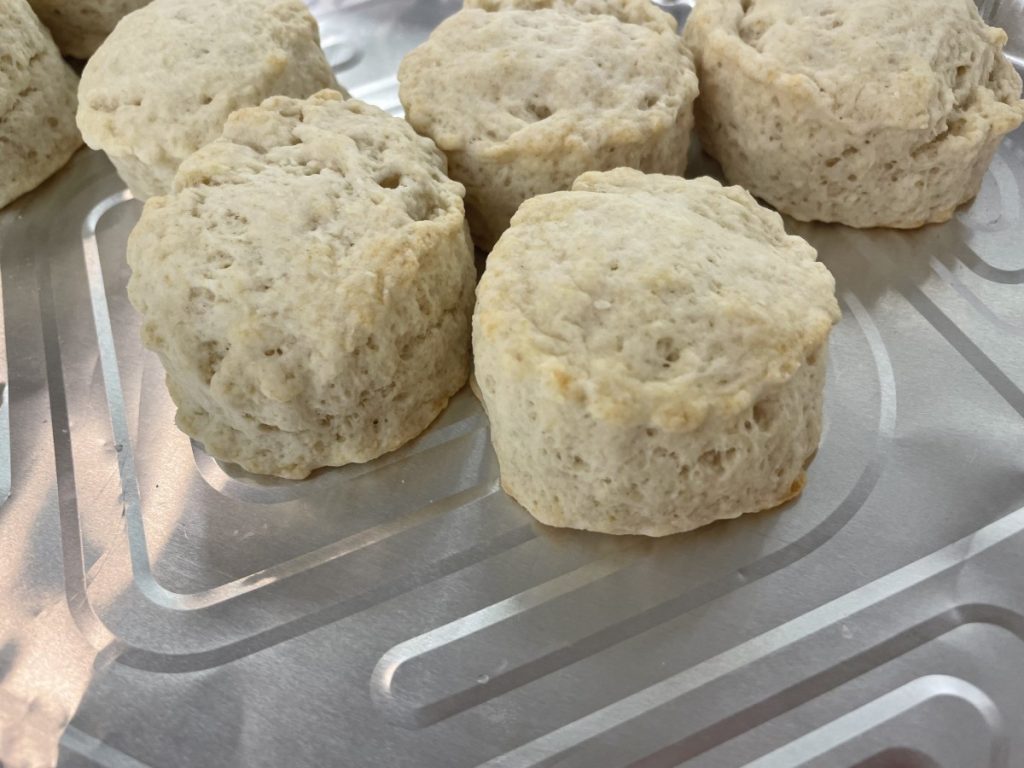
Here is the cut out version made in class last week
Mini Strawberry Shortcakes


These little shortcakes are as cute as they are tasty. You can have all the components ready, then just assemble when ready to serve.
Fun to serve at parties, picnics and cook outs. Because these are small, they work well with other desserts on larger dessert trays.
I made the shortcake base with a scone recipe, and used a small ice cream scoop to put the batter on the baking sheet. They ended up looking like little sandwich buns. One friend said they looked like sliders.
I split them, and filled with sweetened strawberries. I replaced the top and added chocolate ganache and whipping cream to finish them off.
The scone is tender and not too sweet. Satisfying and light at the same time.
Mini Strawberry Shortcakes
The shortcakes
2 c. flour
1/4 c. sugar
½ t. salt
1 T. baking powder
1 1/4 c. heavy cream or 1 cup half and half
Preheat oven to 425 degrees. Sift together dry ingredients and gradually add cream to form soft dough. Stir mixture until it just holds together. Using an ice cream scoop place batter on baking sheet a couple of inches apart. You should get about a dozen. Bake 10-12 minutes or until golden. Makes about 12. Cool on rack until ready to use.
The berries
2 lbs. strawberries, sliced thin
1/2 c. sugar, or to taste
Combine berries and sugar in medium bowl and place in fridge until ready to use. Berries should be in the sugar for at least a couple of hours and can even be prepped a day ahead to allow the juices to come out of the berries.
The ganache
1 c. semi sweet chocolate chips or 6 oz. semi sweet chocolate, chopped
1/2 c. heavy whipping cream.
Combine both in double boiler or in microwave and heat until mixture is just warm enough to melt the chocolate. Stir until smooth.
The whipped cream – use whipped cream, sweetened or unsweetened according to your taste.
Assembly: Slice the caps off the tops of the shortcakes. Place a generous spoonful of the sliced berries on the bottoms of the shortcakes and spoon some of the strawberry liquid over them as well. Place the tops of the shortcakes back on and spoon on a dollop of the chocolate ganache. I let me get to room temperature so it didn’t drip down exactly as I had planned. Top with some whipped cream and serve. Makes about 12.
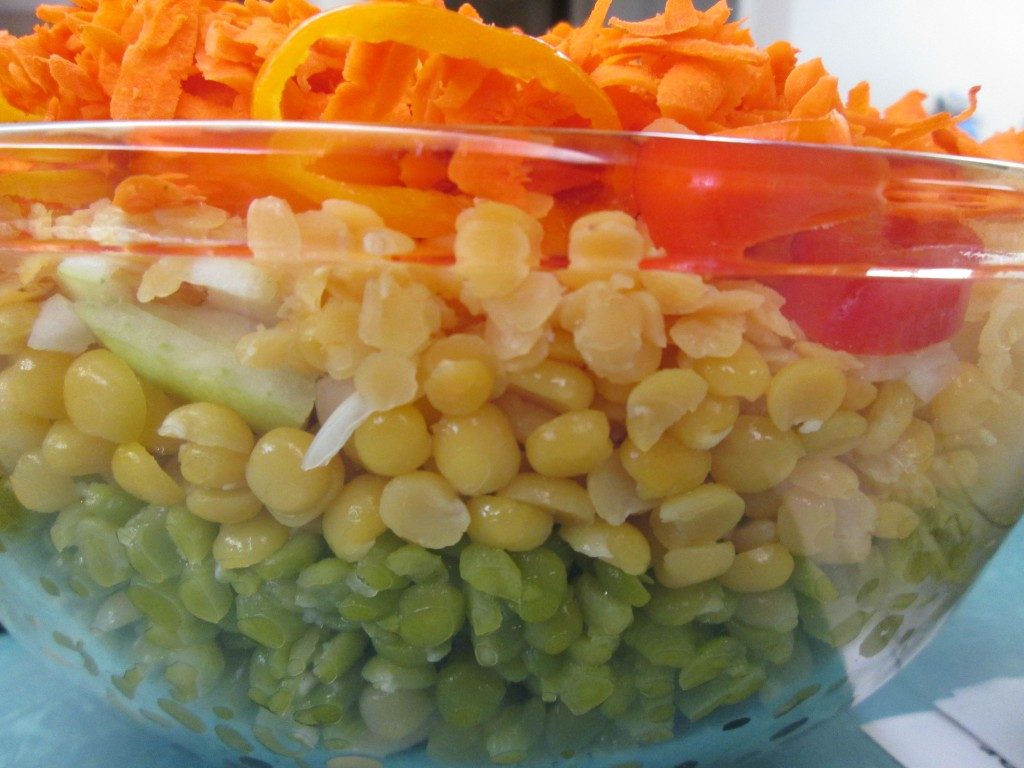
Rainbow Salad

When you hear green or yellow split peas- do you think of soup? You probably do. But when cooked until just tender, split peas make a great salad ingredient. I often just add some cooked split peas to a tossed salad. They add flavor, protein and a nice texture to salads. An added bonus is that split peas can be cooked from dry to tender in about 20 minutes. That makes them a great choice when time is tight.
This is one of my favorite salads using both green and yellow split peas. Fresh and colorful, it is a big hit with vegetarian and non-vegetarian friends. If some of you are looking for new meatless meals ideas, this one is a winner.
The salad uses both green and yellow split peas, along with black beans, butter beans, red lentils and assorted veggies. It is a great combination of colors and textures. It does make a lot, but you can easily cut the recipe in half.
The dish was inspired by my nephew Danny’s love of sand art when he was a kid. The ingredients are layered in the bowl for a pretty presentation. It is also an homage to the layered salads I remember from my youth. I like this one a whole lot more.
Rainbow Salad
1 c. each green split peas, yellow split peas and red lentils
1 can black beans, rinsed and drained
1 can butter beans, rinsed and drained
1 c. diced sweet onion
1 c. diced sweet pepper
1 c. grated carrot
Cook split peas and lentils separately just until tender. Split peas, both green and yellow will take 20 minutes. Red lentils will take about 8-10 minutes. Drain and rinse each under cold water when done and set aside until ready to use, or you can cook them a day ahead and keep chilled. Each will yield about 2 1/2 c. cooked.
In large glass bowl, place the following ingredients in this order.
Black beans, butter beans, green split peas. yellow split peas. onion, red lentils. carrots and peppers. Pour over dressing and chill several hours or overnight. Serve on a bed of greens. You can also leave the salad plain and serve dressing on the side.
Dressing *
1/2 c. oil
1/2 c. vinegar, I like apple cider vinegar or red wine vinegar
1 (14 oz.) can diced tomatoes, undrained
2-3 T. sugar
1/2 c. parsley or cilantro
1 t. each chili powder, cumin and salt
dash hot sauce
Combine in a blender or food processor until smooth.
*Note: Any fresh or bottled dressing you like can be used. Balsamic works very well. I often serve it with homemade Italian dressing.
English Toffee Crunch

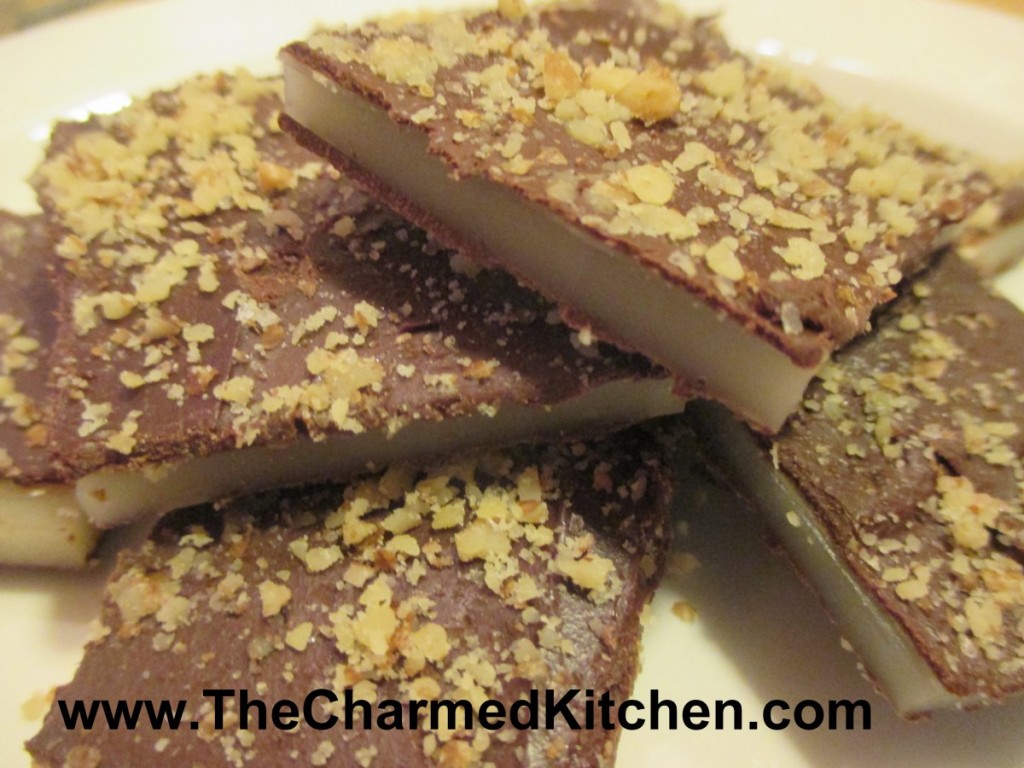
If you are looking to make a special sweet treat, English Toffee Crunch is always a good choice. The crunchy, sweet toffee is coated with chocolate on the top and bottom, along with a sprinkling of fine chopped nuts. A classic, for sure.
I know people are sometimes a little scared about making candy, but this is pretty easy to make, and well worth the effort. The only special piece of equipment you will need is a candy thermometer. Just be careful when handling the hot ingredients. The end result is a special treat. Nice gift for Father’s Day.
English Toffee Crunch
1 1/2 c. sugar
2 sticks butter
3 T. water
1 T. light corn syrup – recipe follows for a substitute
3/4 lb. milk or dark chocolate, or chocolate chips
1/2 c. very finely chopped walnuts or pecans
Over low heat, stirring constantly, cook sugar, butter, water and corn syrup until mixture reaches hard crack stage (300-310 degrees). You will want to attach a candy thermometer to the pan to monitor the temperature. Pour onto ungreased jellyroll pan tilting quickly in all directions to get toffee as thin as possible. It hardens up unbelievably quickly so work fast. I like to warm the cookie sheet a little in the oven so it buys me a few extra seconds to thin out the toffee. Harden in fridge about five minutes or let stand at room temperature until cooled down. Melt chocolate in double boiler or microwave and spread half of it over toffee, spreading to edges. Sprinkle with half the nuts and return to fridge it harden chocolate. Turn toffee carefully onto another sheet and coat the bottom with the remaining chocolate and nuts. Chill until chocolate hardens then break up into bite sized pieces. Note: you can use even more chocolate if you like a thicker coating. Store in a cool, dry place in an airtight container. Makes 1 1/2 lbs.
Homemade Corn Syrup Substitute
2 cups granulated sugar
3/4 cup Water
1/4 tsp. Cream of Tartar
dash of salt
Combine all in a large, heavy stainless steel pot. Stir and bring to a boil. Reduce heat to a simmer and cover with lid for 3 to 4 minutes to get the sugar crystals off the sides of the pan. Uncover and cook to softball stage, 238 to 240 degree’s F. or when a small amount is dropped into cold water and does not hold its shape; stir constantly. Cook for another minute. Cool and store in covered jar at room temperature, will keep well for 2 months at room temperature.
For dark corn syrup add 1/4 cup molasses
Homemade English Muffins

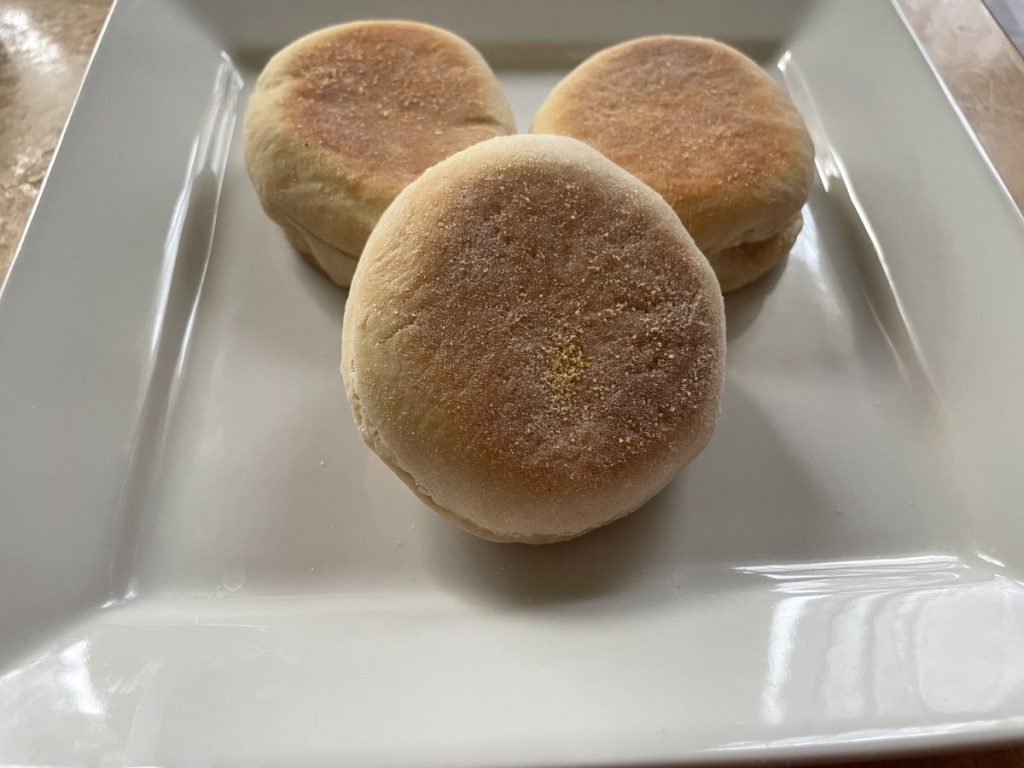
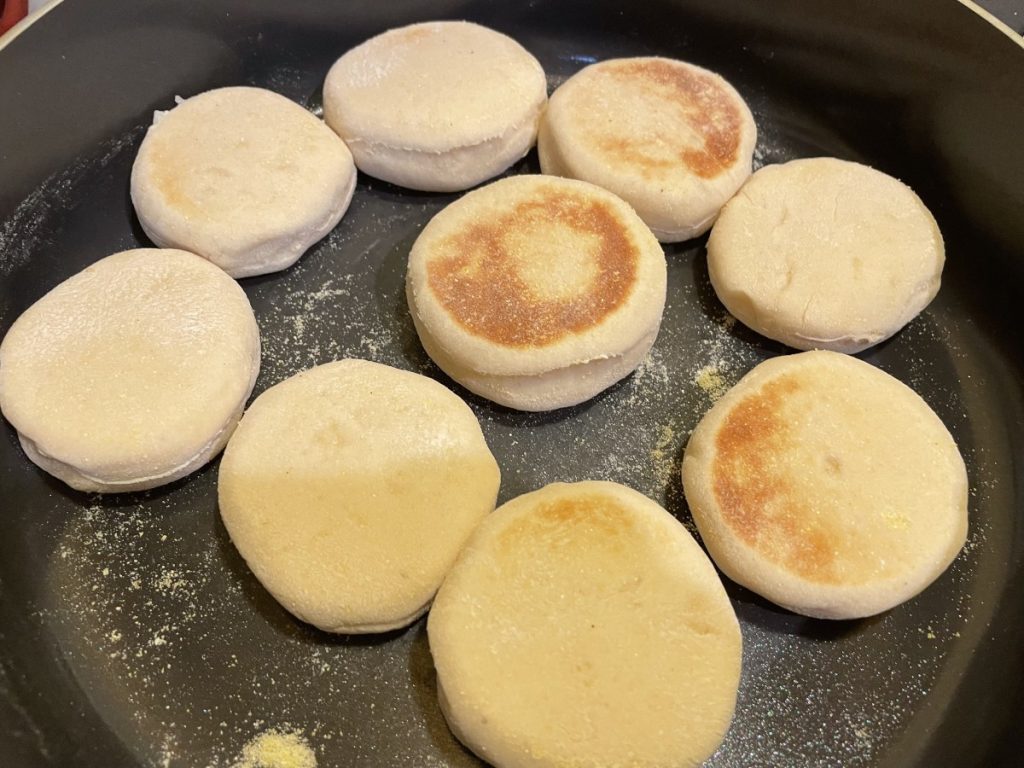
English Muffins are fun and easy to make. They also taste so much better than store bought. What you might not know, if you never made them, is that English muffins are not baked. They are actually cooked in a skillet, over medium low heat, until cooked.
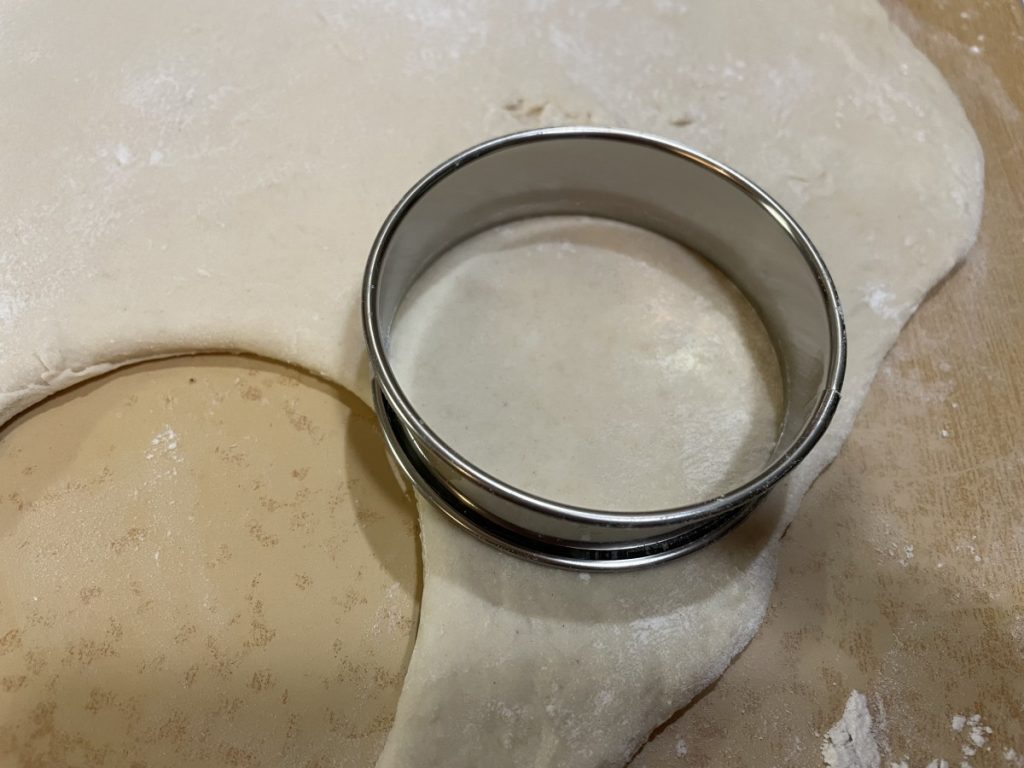
The dough is pretty much a bread dough. Once they have gone through their first rise, you roll them out and cut them out in circles. They rise another 30 minutes, then are cooked in the skillet. You can use a 4-inch cutter for full sized muffins. I used a 3-inch cutter and got a few more out of the recipe.
The recipe is correct when it says to roll them a bit under 1/2-inch thick. They rise and then get thicker when cooked.
English Muffins
2 packages yeast
5-6 cups bread flour
2 T. sugar
2 t. salt
2 c. milk
¼ c. butter
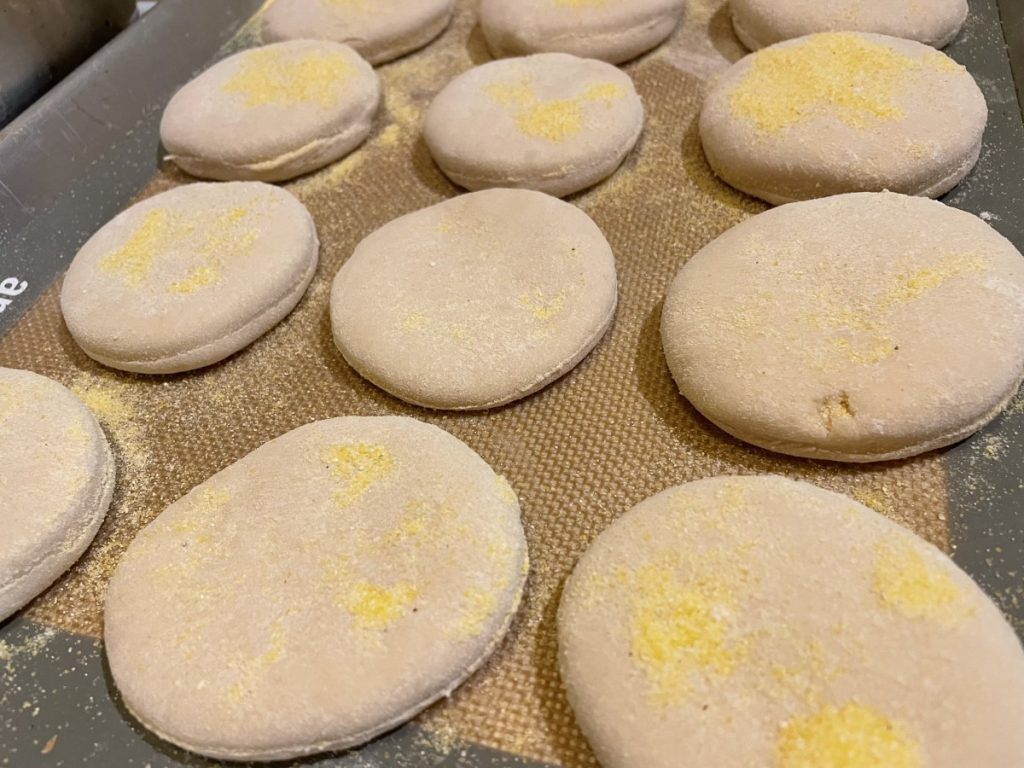
Cornmeal
In large bowl combine yeast, 4 cups of the bread flour. Warm milk and butter and add to flour mixture and beat 3-4 minutes. By hand stir in enough flour to make a moderately stiff dough. Turn onto floured surface and knead until dough is smooth and elastic, about 8-10 minutes.
Place dough in greased bowl and turn to grease top. Cover and allow to rise until doubled, about 1 ¼ hour. Punch dough down and allow to rest 10 minutes. On lightly floured surface roll dough to just under ½-inch thick. With 4-inch biscuit cutter cut out rounds of dough, re-rolling and cutting scraps. Dip both sides in cornmeal and cover, allowing to rise about 30 minutes. In ungreased griddle pan or skillet cook muffins over medium-low heat, turning frequently, until they are golden on both sides and cooked through. This will take about 20-25 minutes. If they are browning too quickly, turn down the heat a little. To serve, split and toast. Makes 12-18, depending on the size you cut them.
Blackberry Pie Filling

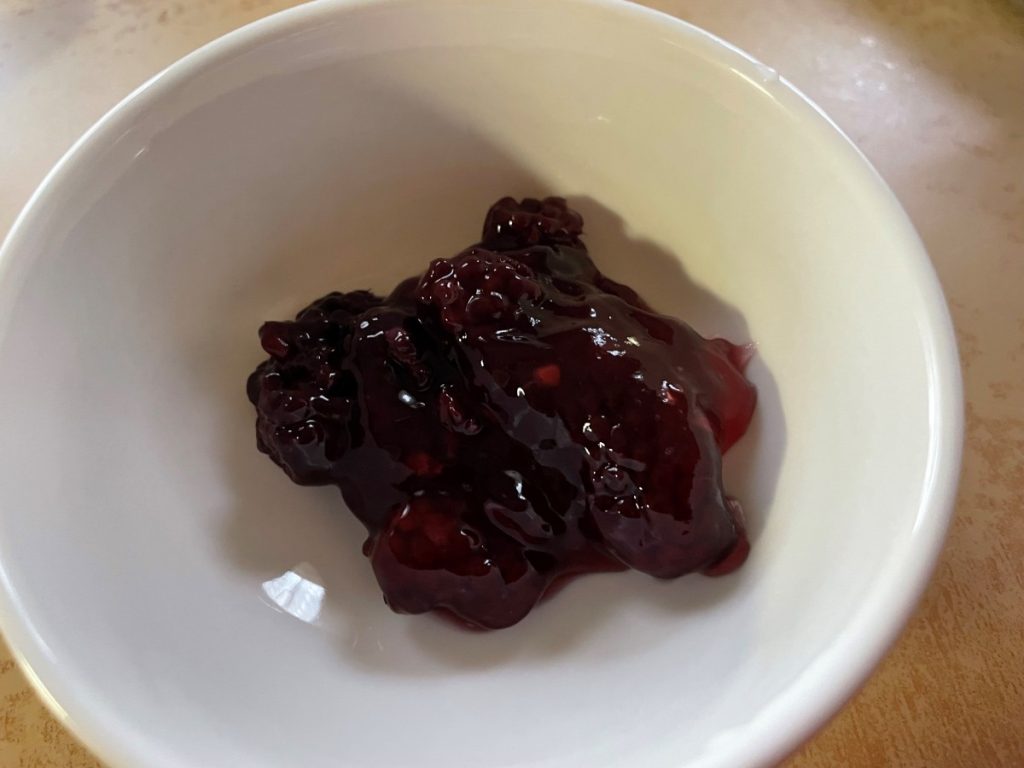
I have been a little obsessed with blackberries lately. A store in my area has been having great prices on them lately. I picked up this most recent bunch for 99 cents per 6 ounce package. I made sorbet, ate plenty of them fresh and shared with friends.
I had made plenty of blackberry jam, so this time I decided to make pie filling. I found an Extension approved recipe, that I felt confident would work.
It came out great. One option in the recipe is to use juice- blackberry juice specifically. I had thought about it, but just used water in the end.
So here is the recipe.
Blackberry Pie Filling
6 qts. Whole blackberries, about 14-15 lbs.
6 c. sugar
2¼ c. Clear Gel
7 c. cold water or juice
½ c. bottled lemon juice
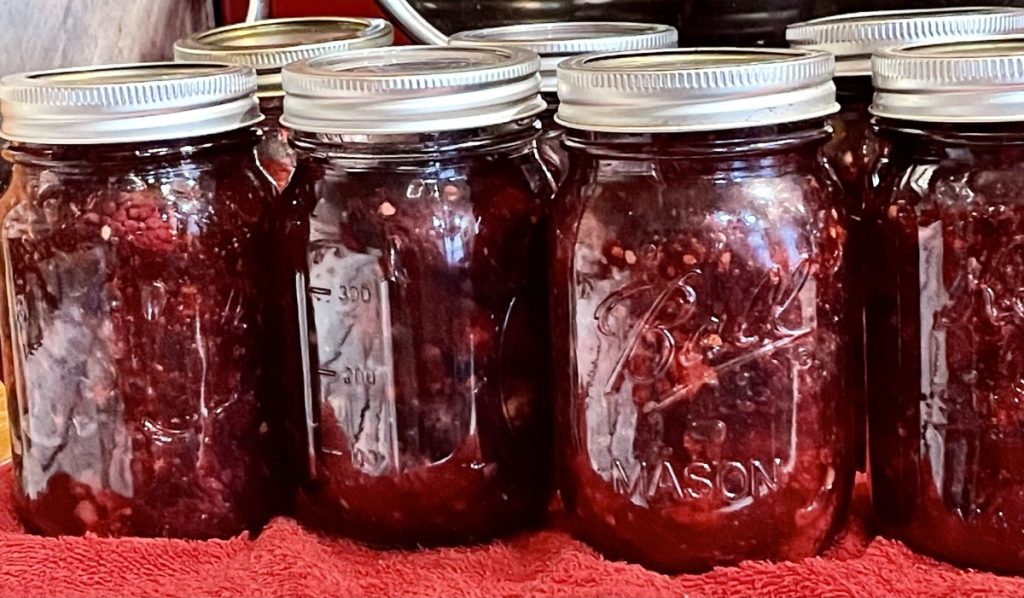
Prepare canner by filling with water and bringing to a simmer. Wash and prepare jars and lids. Bring a pot of water to a boil and blanch the berries in the water for 30-60 seconds. The berries should be warmed through. You can do this in batches. Remove the berries with a slotted spoon gently and place in a bowl. Cover with a towel and keep warm while you prepare the rest of the ingredients. In a large pot, combine the sugar, Clear Gel and cold water or juice. Whisk until Clear Gel is completely dissolved. Place over medium high heat and stirring constantly, bring to a simmer and until mixture thickens. Add the lemon juice and continue cooking another re minute. Fold in the berries. Ladle mixture into the jars, leaving an inch of head space. Be sure to get all the bubbles out with a plastic utensil. Wipe jar rims, adjust lids and repeat with the remaining ingredients and jars. Place jars in canner and start timing when water returns to the boil. Process pints or quarts 30 minutes. Makes 7 quarts or 14 pints.
Note: I made a half batch and ended up with 7 pints. Times and directions remain the same.
Source : Washington State Extension Service
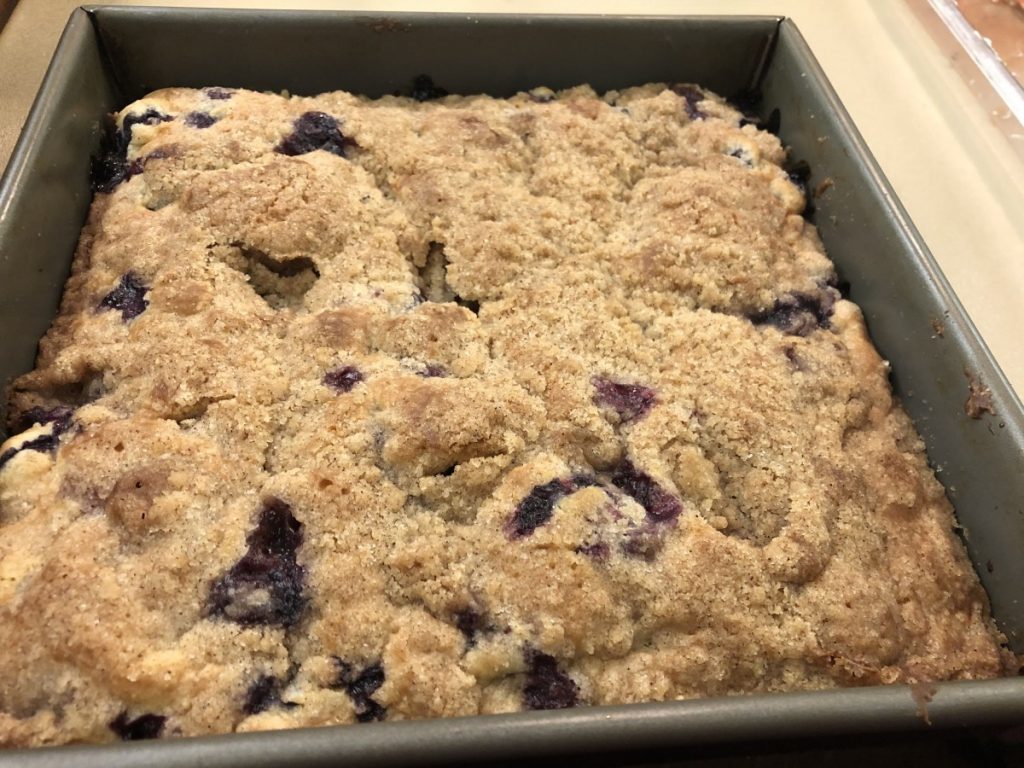
Blueberry Crumb Cake

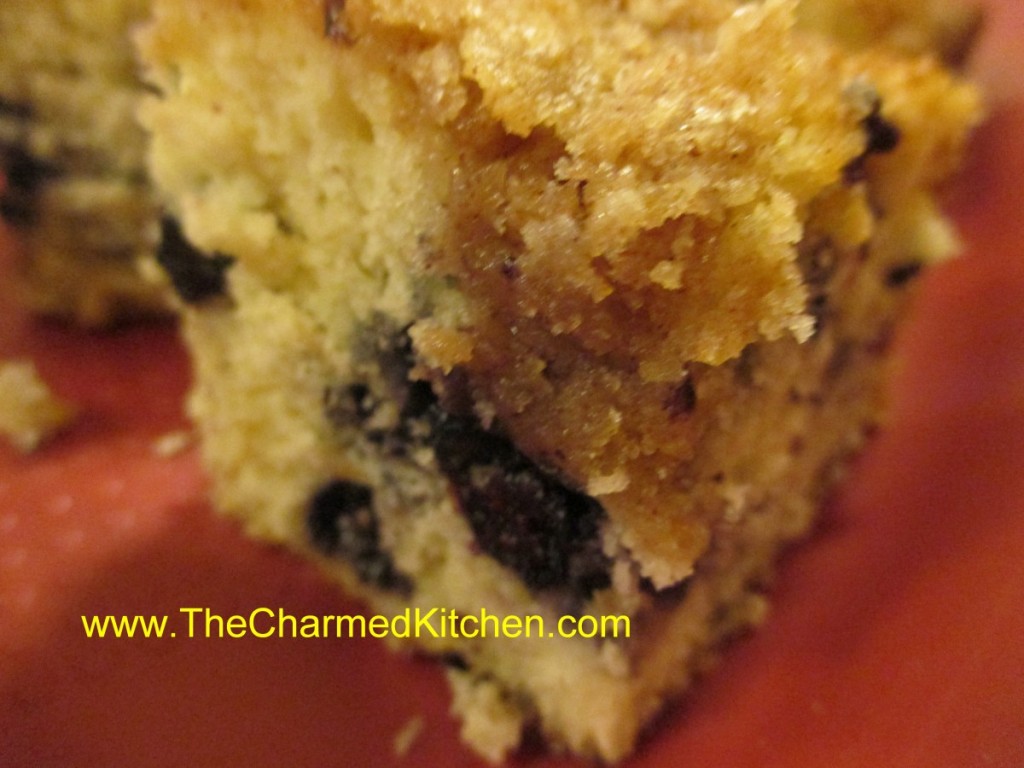
This has always been a favorite cake of mine. The mixture of moist cake and berries would be great on their own, but that crunchy, crumb topping- oh my! Talk about a wonderful combination.
It isn’t a difficult cake to make at all. It is an extra nice cake to take along to picnics and cook outs since there is no frosting to worry about. It can be served plain, or served with a scoop of ice cream of some whipped cream.
So here is the recipe. Enjoy!!
Blueberry Crumb Cake
For cake batter:
2 c. flour
2 t. baking powder
½ t. salt
½ stick (¼ cup) butter, softened
¾ c. sugar
1 egg
½ c. milk
1 pint blueberries, fresh or frozen
For topping:
½ c. sugar
¼ c. flour
½ t. cinnamon
½ stick (¼ c. butter, chilled and cut into bits)
Combine dry ingredients and set aside. In mixing bowl with electric mixer, beat butter and sugar until light and fluffy. Beat in egg and milk. Add flour mixture gradually until just mixed in. Fold in blueberries. Grease and flour an 8 or 9-inch square baking pan and add prepared batter. Combine topping ingredients until they resemble coarse crumbs. Sprinkle over batter in pan and bake in a preheated 375-degree oven and bake for 35-45 minutes. Use toothpick to test.
Note: I have used a 9-inch round pan and it worked fine.